In homes, it’s the clutter of extension cords and tangled power boards. In businesses, it’s overloaded workstations, splitters under every desk, and the quiet risk of circuits doing more than they should.
Across Sydney, poor planning around power point installation isn’t just common, it’s expected. Most buildings, new or old, rarely account for how we actually use electricity day to day.
Whether you’re managing a household or running a commercial space, the need is the same: safe, accessible power where it’s needed most.
This guide is built to help you plan it right. We’ll break down the types of power points available today, show you where they work best, and flag what to watch for, so you’re not back here in six months, redoing what should’ve been done properly the first time.
Types of Power Points (What You Can Install Today)
Not all power points are equal, and not all should be used the same way.
What belongs in a café doesn’t belong in a bedroom. What works behind a TV wall won’t survive near a garden tap.
Here’s how power points are being used across Sydney homes and workplaces, and what’s worth considering before the installation starts.
1. Residential Setups
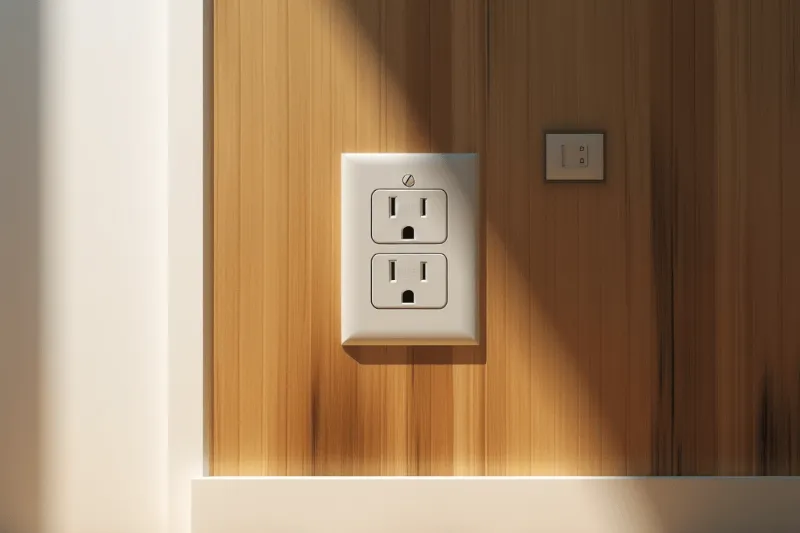
✔ Standard Sockets – Single or Double
Still, the most common type and for good reason. Doubles are now the baseline in most new builds, giving you space without relying on boards. Singles are best kept in low-use areas like hallways or broom cupboards.
✔ USB Integrated Outlets
Built for convenience. These combine standard sockets with one or two USB ports, so phones, tablets and smartwatches can charge straight from the wall. They’ve become a staple in bedrooms and study nooks.
✔ Slimline or Glass Faceplates
Minimalist designs that blend into high-end interiors. The finish doesn’t change function, but for modern kitchens and renovated living rooms, the visual payoff is worth it.
✔ Weatherproof Outdoor Points
You’ll need these for any powered outdoor space like patios, garages, and garden sheds. Rated to handle Sydney’s unpredictable weather, and required by law in certain zones.
2. Commercial & Workspace Requirements
✔ Quad Power Outlets
A must for desks, counters and shared stations. These reduce clutter, cut out power boards, and make compliance easier in open-plan layouts.
✔ Dedicated Appliance Circuits
Heavy-load devices like barista machines, printers or commercial fridges can’t just be plugged in anywhere. These circuits are wired separately to handle sustained demand, protecting the equipment and your overall supply.
✔ Floor Boxes & Desk Modules
Clean power access under tables or workstations. Essential in boardrooms, shared office desks, and shop fitouts where wall outlets don’t make sense.
✔ Lockable or Tamper-Proof GPOs
Installed in clinics, schools, gyms and public zones where access needs to be controlled. They prevent damage, unauthorised use, or disconnection.
Each of these has a place, but only if installed with the end use in mind. The wrong choice leads to workarounds. The right one disappears into the space and just works.
Where to Install Power Points: Practical Placement That Works
A good power point isn’t just installed. It’s anticipated. Done right, you’ll forget it exists, because it’s always where you need it. Done poorly, and it becomes one of those daily annoyances you work around for years.
Here’s how to think about placement, whether you’re setting up a home, a business, or something in between.
1. In Homes: Think Habits, Not Walls
✔ Bedrooms
Place sockets beside each side of the bed, not behind it. If space allows, consider USB combos for night-time charging. Also, plan for dressers, lamps, or vacuum docking stations.
✔ Living Rooms
Outlets belong where the tech lives. Behind TV units. Near the sofa for charging cables. At floor level for lamps or smart speakers. Avoid forcing everything into one corner.
✔ Kitchens
Don’t just install outlets, zone them. One on each end of the benchtop. One for the kettle. Another for the toaster. If you’re using appliances under cabinets, include a GPO behind them, not just above.
✔ Garages & Sheds
Tool charging stations. Pressure washers. Freezers. These zones are often afterthoughts, but they’re power-hungry. Plan multiple outlets, ideally at bench height, not down near the floor.
✔ Outdoors
BBQs, heaters, fairy lights, robot lawn mowers, and outdoor power use is growing fast. Install weatherproof sockets in spots where you’d naturally plug something in, not just “somewhere on the wall.”
2. In Workspaces: Think Flow, Access & Safety
✔ Desks & Workstations
Every desk needs at least two sockets, ideally four. Don’t rely on under-desk boards. Surface modules and flush-mounted outlets reduce trip hazards and make setups more efficient.
✔ Boardrooms & Meeting Rooms
Power needs to come from under the table, not across the floor. Floor boxes with GPOs and data ports are now the standard for fitouts done properly.
✔ Retail Counters & POS Areas
POS systems, EFT terminals, monitors, and receipt printers all require power. Plan outlets for redundancy and easy swap-outs, especially in tight counter zones.
✔ Clinics, Salons, Studios
If your tools rely on power, your layout should too. That means wall outlets at usable heights, spaced logically for each workstation, without the need for extension cords running across the floor.
Power point placement is less about where you can put them, and more about how you use the space.
Start with behaviour. Map out movement. Plan power where hands reach, not where walls end.
How Power Point Installation Actually Works
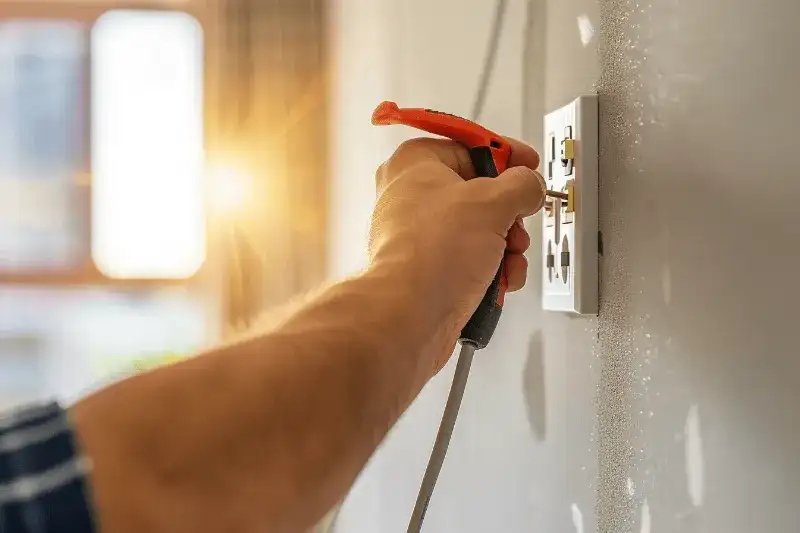
A power point may look simple, but the installation behind it demands precision. And more importantly, a license.
In New South Wales, it’s illegal to install power points unless you’re a licensed electrician. That’s not red tape, it’s risk mitigation. The wrong connection, the wrong cable, or the wrong circuit protection can spark a fire, damage appliances, or worse.
Here’s how a proper installation gets done.
Step-by-Step: What a Licensed Electrician Does
1. Assessment & Planning
It starts with a look at your existing circuits. Is there enough capacity to add another outlet? Are RCDs in place? Will the new point need its own line from the switchboard?
In older homes or busy commercial spaces, this step is where upgrade needs are often discovered, especially if you’re adding more than one outlet.
2. Power Isolation
Before anything gets touched, the mains are shut off at the switchboard. The electrician tests circuits with a voltage tester, not guesswork, to confirm it’s safe to proceed.
3. Wall Access & Cabling
If it’s a retrofit, a cavity is carefully cut into the wall. Cables are fed through either the ceiling or the floor space, depending on the site. This can get tricky in double-brick or tightly packed walls, another reason DIY isn’t an option.
4. Connection & Mounting
The wires (live, neutral, and earth) are connected according to AS/NZS 3000 standards. The socket is mounted flush and securely to prevent movement or warping over time.
5. Testing & Compliance Check
Once power is restored, the outlet is tested for voltage, load handling, and RCD response. If anything fails, it’s fixed immediately. You should also receive a compliance certificate if new circuits were added or upgraded.
What Impacts Safety: Things Most People Overlook
Power points are so familiar, they often get taken for granted. But behind every one is a web of factors that affect safety, not all of them obvious, and not all caught in the average quote.
Here’s what often gets missed until the install begins:
1. Outdated Switchboards
Many Sydney homes and older commercial buildings still run on boards that weren’t designed for today’s power demands.
If your system doesn’t support modern RCD protection or lacks capacity for more outlets, you’ll need to upgrade before anything goes in.
This doesn’t mean every new power point needs a switchboard replacement.
But a licensed electrician will flag it early, before you waste time (and money) on a layout that can’t be supported.
2. Circuit Overload Isn’t Always Obvious
One double power point too many might seem harmless, until it starts tripping the breaker or running hot behind the wall.
It’s not about how many sockets you can fit on a wall. It’s how much load the circuit can handle.
This matters most in:
- Kitchens with multiple appliances
- Workspaces with printers, monitors, and desktop towers
- Garages and sheds using high-draw tools or chargers
If your electrician doesn’t talk about load balancing? You’re working with the wrong one.
3. Environment Matters (More Than You Think)
Install a standard GPO near the kitchen sink or outdoors, and you’re risking more than just inconvenience.
Moisture, heat, or dust can degrade connections fast and without proper protection, leading to failure or fire.
That’s why the best electricians don’t just install what fits. They ask how the space is used and plan for what could go wrong, not just what looks fine today.
The safest power points are the ones that were planned properly. That means understanding what’s behind your wall, what else is on the line, and how the space is going to be used before anything gets cut or wired.
How Much Does Power Point Installation Cost in Sydney?
Costs depend on how complex the job is, what type of outlet you’re installing, and whether your current electrical system can support it.
Here’s what Sydney property owners can realistically expect.
1. Typical Pricing in Sydney (2025 Range)
| Installation Type | Estimated Price (per outlet) |
| Standard single or double GPO | $140 – $180 |
| USB-integrated outlet | $150 – $200 |
| Weatherproof or quad outlet | $180 – $250 |
| New circuit or 15A outlet | $400 – $800 |
These figures include labour, materials, and basic compliance checks. If your home or commercial site needs switchboard work, wall chasing, or longer cabling, that’ll push the cost higher.
2. How Long Does It Take?
| Job Type | Time Estimate |
| Basic outlet near existing line | 30 – 45 minutes |
| USB/weatherproof outlet | 45 – 60 minutes |
| New circuit installation | 1.5 – 2 hours |
| Multiple outlets or board work | Half-day or more |
Grouped installs save time and money, especially in renovations or full-office upgrades.
3. What Affects Cost?
Several factors can change the final quote:
- Wall type: brick and tile, add time
- Access: tight ceiling spaces or commercial racks
- Switchboard capacity: may need upgrades for compliance
- Outlet location: distance from the switchboard matters
- Number of points: more outlets = better per-unit value
If you’re booking more than one outlet, most electricians (Olympic included) will factor that into pricing.
Common Mistakes to Avoid Before Installation
Most power point issues don’t start with wiring; they start with rushed decisions.
Here’s what trips up homeowners, business owners, and even builders during the planning stage:
1. Assuming “One Outlet Per Wall” is Enough
It’s a trap. Lounge rooms with a single double socket. Bedrooms with one point shared by a lamp, phone charger, fan, and alarm clock.
If you’re relying on multi-plugs or extension cords by default, you’ve underplanned.
Fix: Think in terms of zones, not rooms. Devices move. Habits change. Outlets should match where activity happens, not just where walls allow.
2. Forgetting About Furniture & Fixtures
It’s easy to design an outlet layout on paper. But once the couch gets pushed back or a wardrobe is installed, that perfectly measured socket becomes unreachable.
Fix: Mark out your furniture before planning your power. Visualise how you’ll actually use the room, not just how it looks empty.
3. Installing Without Future Use in Mind
Today, it’s a spare room. Next year? A study. Or a nursery. Or a hybrid office. And that single socket near the door? Not cutting it anymore.
Fix: Add one or two extra points during any renovation or new fit-out. It’s far cheaper to add them now than retrofitting later, especially in brick or tiled walls.
4. Skipping the Switchboard Check
Adding outlets sounds simple, until your electrician finds an overloaded board or no RCD protection. Now the quick job turns into a compliance delay.
Fix: Ask your electrician to assess your board early. Olympic Electrical does this by default, but many don’t.
5. Ignoring Outdoor or Niche Zones
Garages. Patios. Linen cupboards. Sheds. Garden pump zones.
These are often afterthoughts until you suddenly need power and realise there’s none nearby.
Fix: Walk your property and think practically. Ask: “Where would I want power if I needed it tomorrow?” That answer usually saves time and money later.
6. Plan Once. Install Right. Power Every Space That Matters.
Adding power points isn’t a one-off task; it’s a decision that affects how you live, work, and move through a space every day.
Whether you’re fitting out an office, upgrading your home, or just fixing a frustrating gap in your layout, one thing holds true: proper planning and professional installation make all the difference.
Olympic Electrical works with clients across Sydney to install power points that fit the space, comply with every code, and just work, every time. From standard double GPOs to commercial floor boxes and weatherproof outdoor units, the team handles it cleanly, safely, and with no corners cut.
If you’re planning new outlets or unsure where to start, get in touch. A quick conversation could save you a costly retrofit down the line.
Call Olympic Electrical for expert advice, fast quotes, and same-day availability in many Sydney suburbs.
02 8999 3691
Book a consultation